¶ Table of Contents
- Table of Contents
- Quick Start Setup Guide
- Startup
- Media Management
- Profiles
- Quality
- Indexers
- Download Clients
- How to import your existing organized media library
¶ Quick Start Setup Guide
This page is still in progress and not complete. Contributions are welcome
For a more detailed breakdown of all the settings, check Radarr =>Settings
In this guide we will try to explain the basic setup you need to do to get started with Radarr. We're going to skip some options that you may see on the screen. If you want to dive deeper into those, please see the appropriate page in the FAQ and docs for a full explanation.
Please note that within the screenshots and GUI settings in
orangeare advanced options, so you will need to clickShow Advancedat the top of the page to make them visible.
¶ Startup
After installation and starting up, you open a browser and go to http://{your_ip_here}:7878
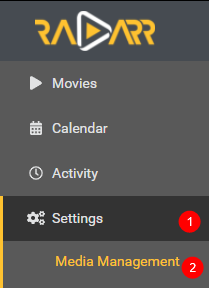
¶ Media Management
First we’re going to take a look at the Media Management settings where we can setup our preferred naming and file management settings.
Settings => Media Management
¶ Movie Naming
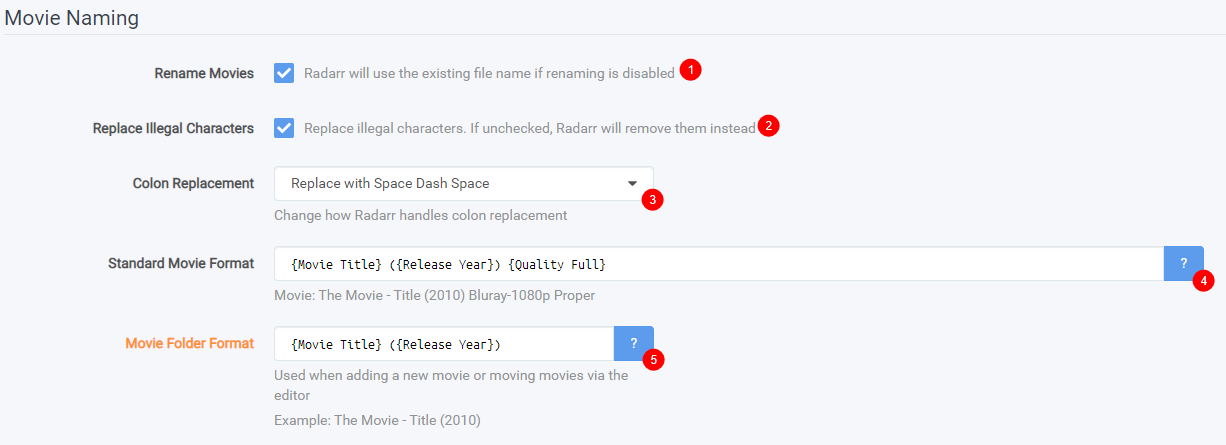
- Enable/Disable Renaming of your movies (as opposed to leaving the names that are currently there or as they were when you downloaded them).
- If you want illegal characters replaced or removed (
\ / : * ? " < > | ~ # % & + { }). - This setting will dictate how Radarr handles colons within the movie file.
- Here you will select the naming convention for the actual movie files.
- (Advanced Option) This is where you will set the naming convention for the folder that contains the video file.
If you want a recommended naming scheme and examples take a look TRaSH's Recommended Naming Schemes.
¶ Importing
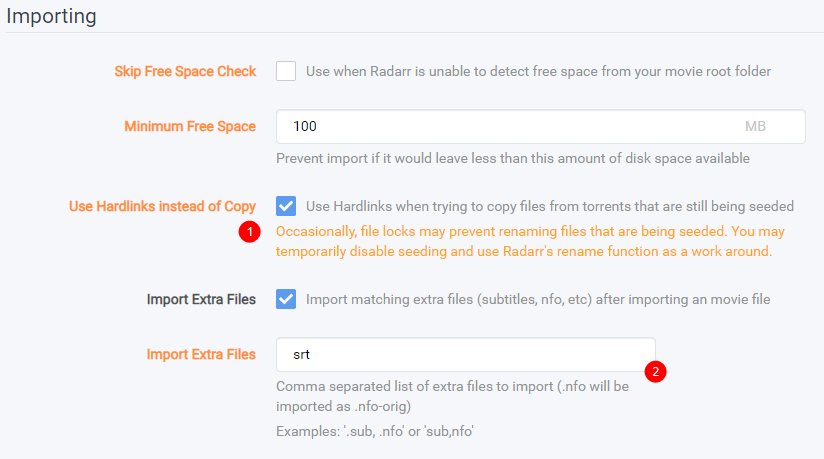
- (Advanced Option) Enable
Use Hard links instead of Copymore info how and why with examples TRaSH's Hard links Guide. - (Advanced Option) Import matching extra files (subtitles, nfo, etc) after importing a file.
¶ File Management
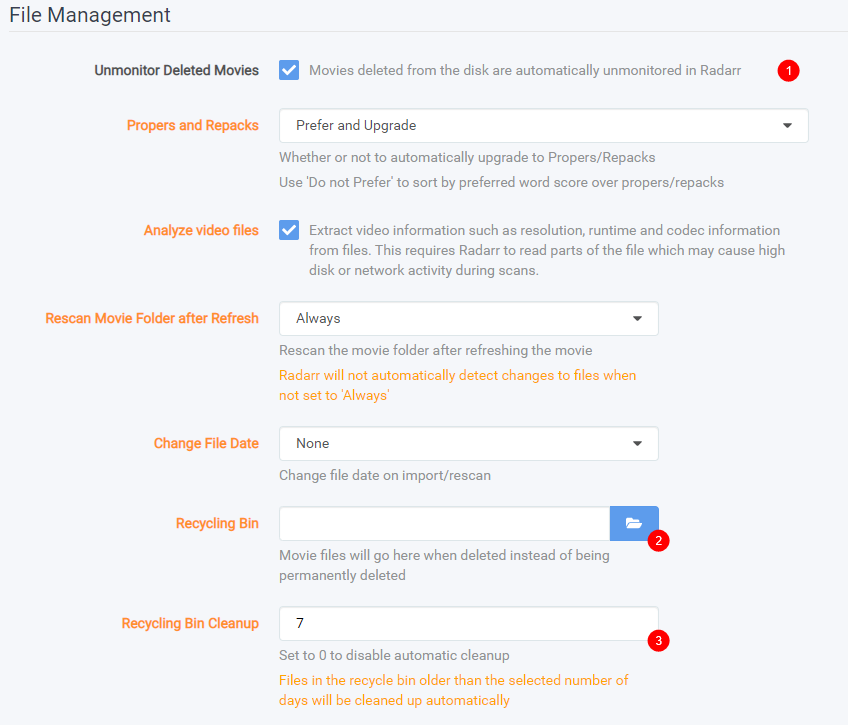
- Movies deleted from disk are automatically unmonitored in Radarr.
- You may want to delete a movie but do not want Radarr to re-download the movie. You would use this option.
- (Advanced Option) Designate a location for deleted files to go to (just in case you want to retrieve them before the bin is taken out).
- (Advanced Option) This is how old a given file can be before it is deleted permanently.
¶ Root Folders

Here we will add the root folder that Radarr will be using to import your existing organized media library and where Radarr will be importing (copy/hardlink/move) your media after your download client has downloaded it.
* Non-Windows: If you're using an NFS mount ensure
nolockis enabled.
* If you're using an SMB mount ensurenobrlis enabled.
The user and group you configured Radarr to run as must have read & write access to this location.
Your download client downloads to a download folder and Radarr imports it to your media folder (final destination) that your media server uses.
Your download folder and media (library / root) folder can’t be the same location
Don’t forget to save your changes
¶ Profiles
Settings => Profiles
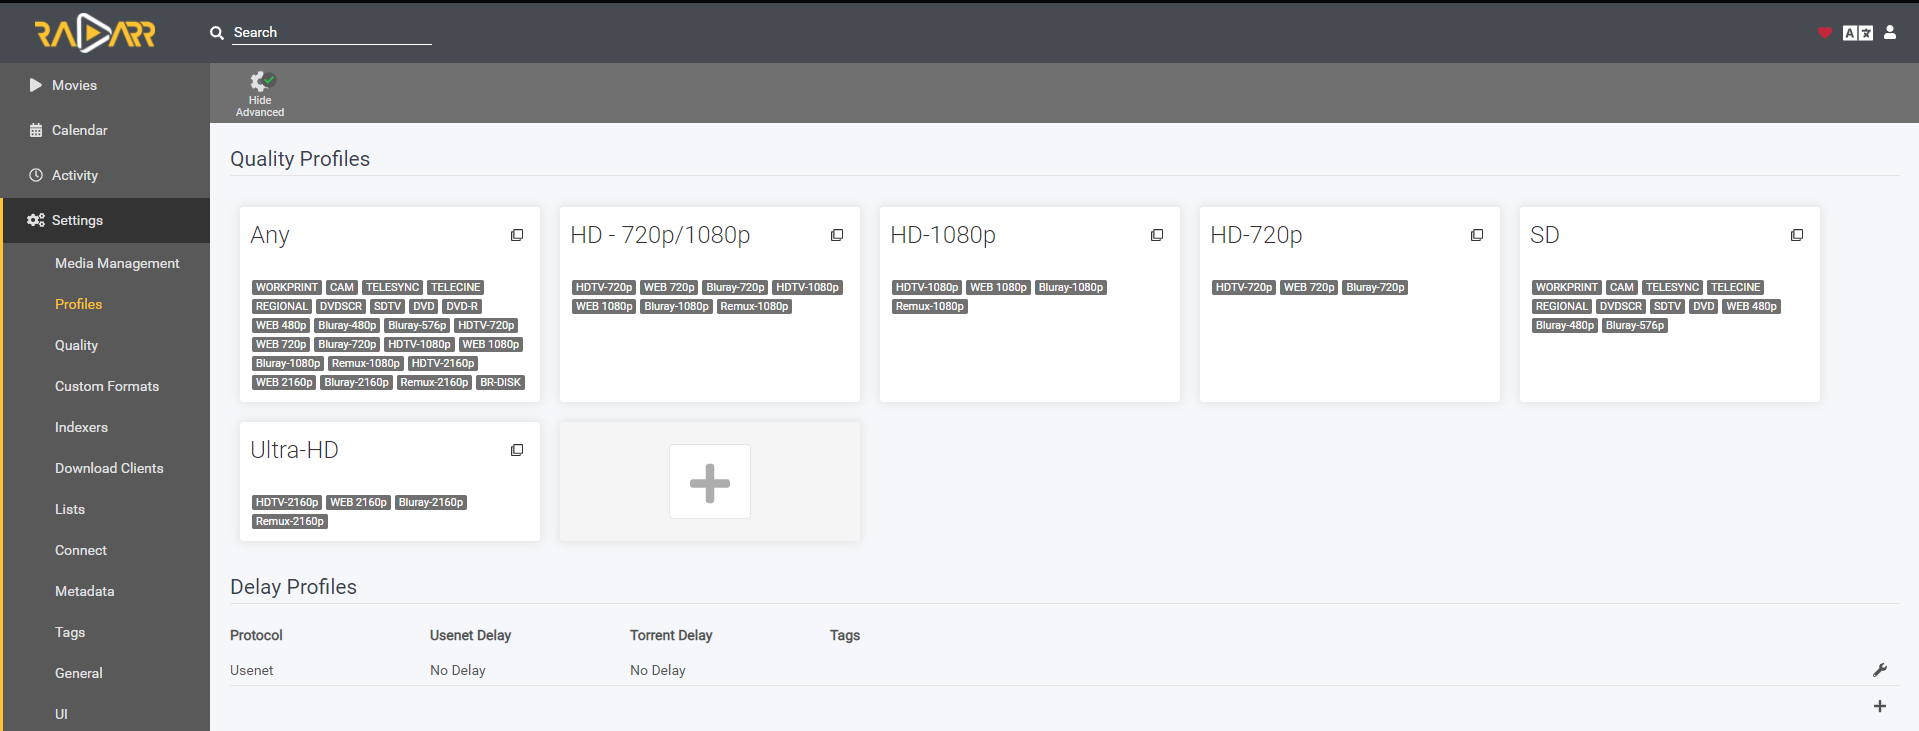
Here you’ll be allowed to configure profiles for which you can have for the quality, preferred language, and custom format scoring of a movie you’re looking to download.
We recommend you to create your own profiles and only select the Quality Sources and Languages you actually want.
For more information on foreign titles and languages see this FAQ entry
Many users find TRaSH's Custom Format Language Guide helpful to specify the languages of movies they want.
Profiles is also where Custom Format Scores are configured. It's strongly recommended to add the below Custom Formats from TRaSH's Guides to avoid unwanted downloads. Refer to the linked TRaSH Guide Custom Format article and additional referenced 3 TRaSH Custom Format Guides on the top of the Collection of Custom Formats page for more information.
- DV (WEB-DL) will avoid grabbing releases with Dolby Vision (DV) that have a green hue if DV is not supported.
- BR-DISK to avoid grabbing poorly named BR-DISKs that do not match the BR-DISK quality parsing.
More info at Settings => Profiles.
To see what the difference is between the Quality Sources look at our Quality Definitions.
¶ Quality
Settings => Quality
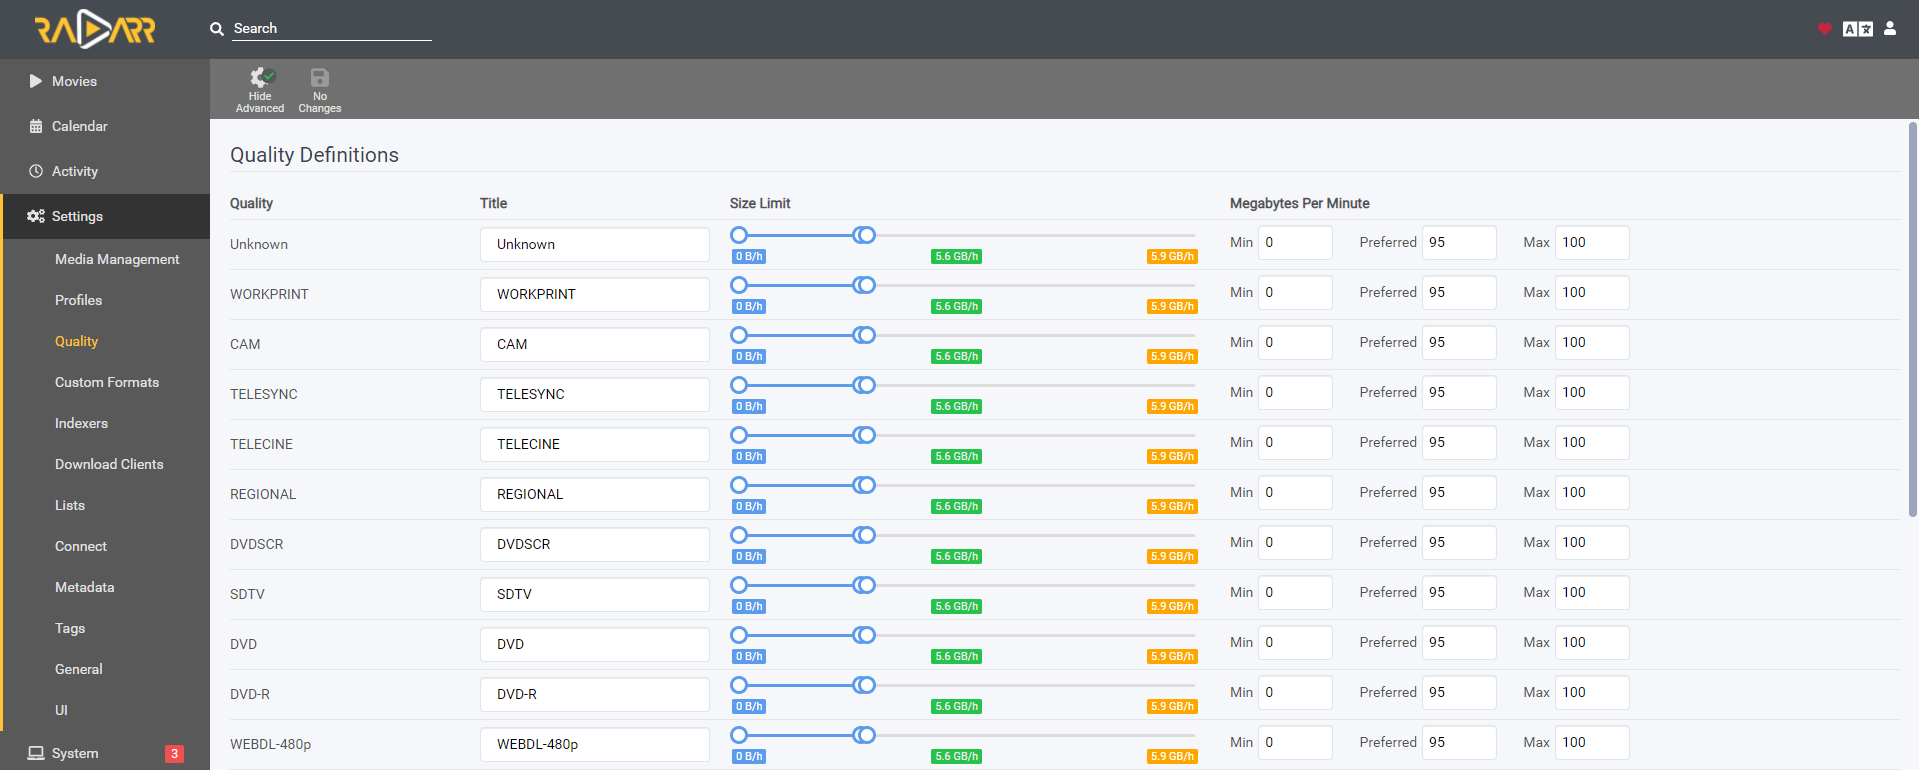
Here you’re able to change/fine tune the min and max size of your wanted media files (when using Usenet keep in mind the RAR/PAR2 files)
If you need some help with what to use for a Quality Settings check TRaSH's size recommendations for a tested example.
¶ Indexers
Settings => Indexers

Here you’ll be adding the indexer/tracker that you’ll be using to actually download any of your files.
Once you’ve clicked the + button to add a new indexer you’ll be presented with a new window with many different options. For the purposes of this wiki Radarr considers both Usenet Indexers and Torrent Trackers as “Indexers”.
There are two sections here: Usenet and Torrents. Based upon what download client you’ll be using you’ll want to select the type of indexer you’ll be going with.
For torrent trackers - almost all require the use of Prowlarr or Jackett.
¶ Download Clients
Settings => Download Clients
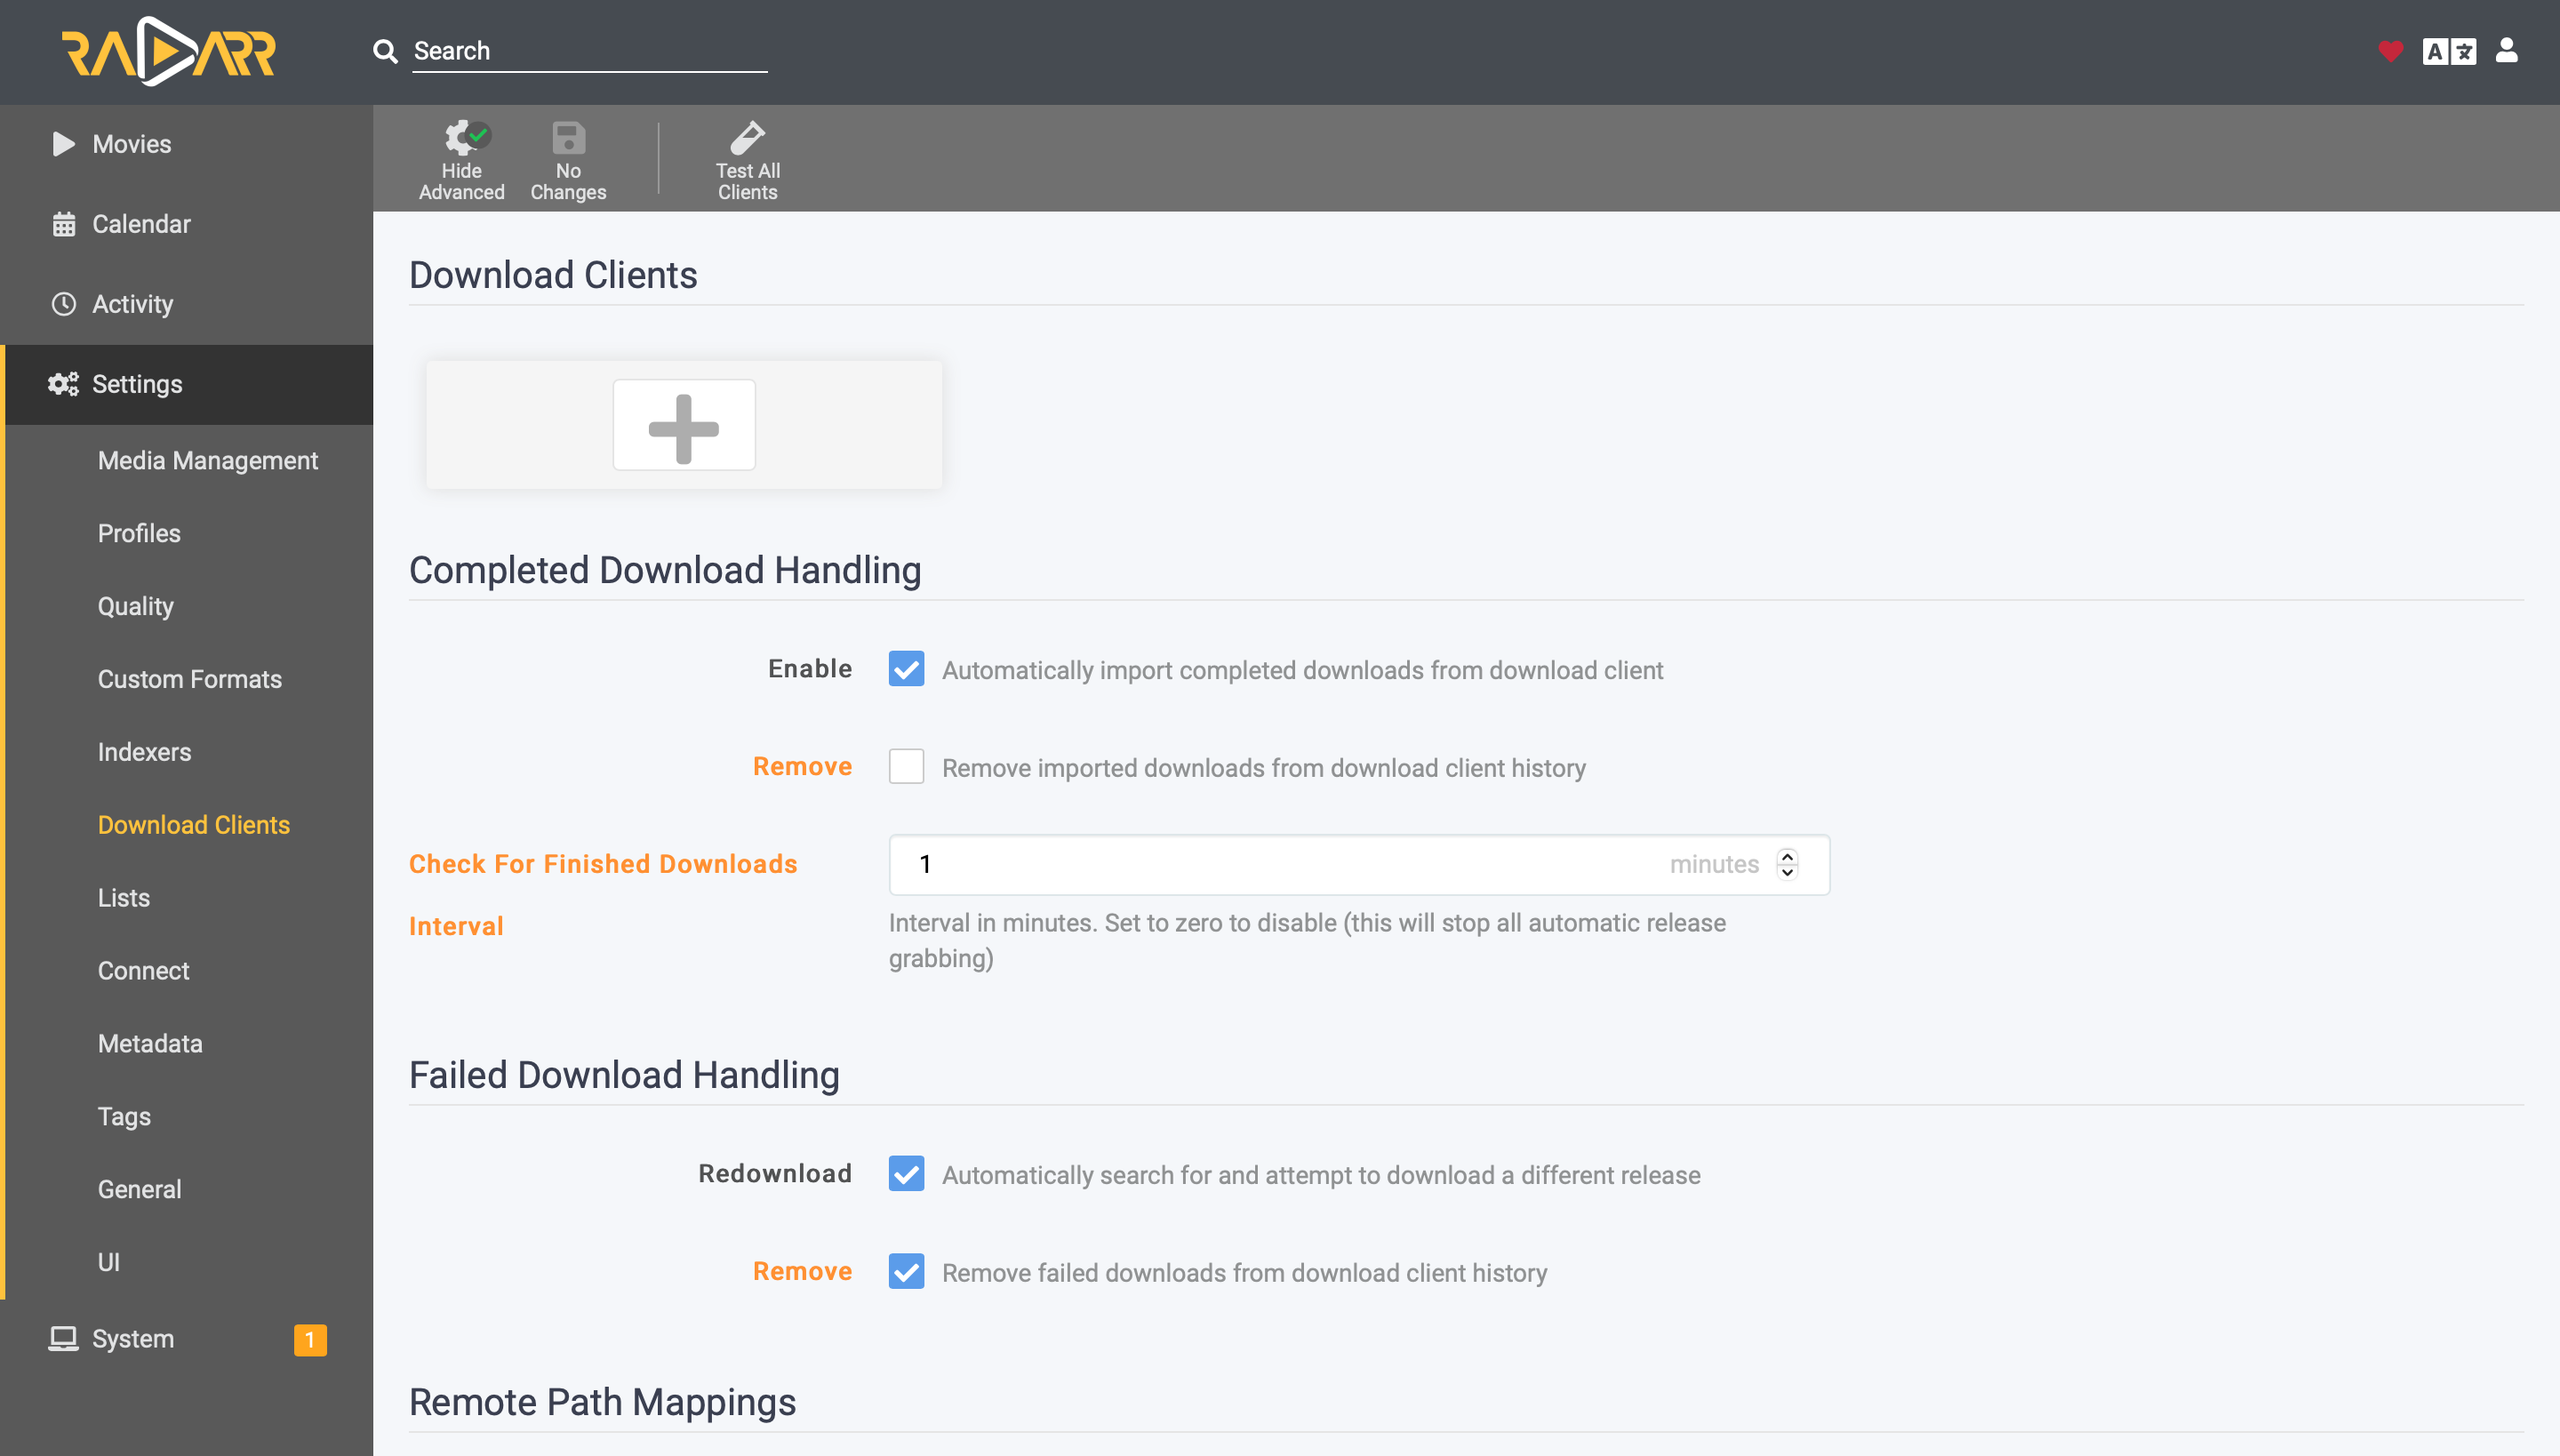
Downloading and importing is where most people experience issues. From a high level perspective, the software needs to be able to communicate with your download client and to have read & write access to the location the download client reports files the client downloads. There is a large variety of supported download clients and an even bigger variety of setups. This means that while there are some common setups there isn’t one right setup and everyone’s setup can be a little different. But there are many wrong setups.
See the settings page, at the More Info (Supported) page for this section, and TRaSH's Download Client Guides for more information.
- Radarr will send a download request to your client, and associate it with a label or category name that you have configured in the download client settings.
- Examples: movies, tv, series, music, etc.
- Radarr will monitor your download clients active downloads that use that category name. It monitors this via your download client's API.
- When the download is completed, Radarr will know the final file location as reported by your download client. This file location can be almost anywhere, as long as it is somewhere separate from your media folder and accessible by Radarr
- Radarr will scan that completed file location for files that Radarr can use. It will parse the file name to match it against the requested media. If it can do that, it will rename the file according to your specifications, and move it to the specified media location.
- Atomic Moves (instant moves) are enabled by default. The file system and mounts must be the same for your completed download directory and your media library. If the the atomic move fails or your setup does not support hard links and atomic moves then Radarr will fall back and copy the file then delete from the source which is IO intensive.
- If the "Completed Download Handling - Remove" option is enabled in Radarr's settings leftover files from the download will be sent to your trash or recycling via a request to your client to delete/remove the release.
- Radarr will send a download request to your client, and associate it with a label or category name that you have configured in the download client settings.
- Examples: movies, tv, series, music, etc.
- Radarr will monitor your download clients active downloads that use that category name. This monitoring occurs via your download client's API.
- Completed downloads that are still seeding will have their files left in their original location to allow you to seed the file (ratio or time can be adjusted in the download client or from within Radarr under the specific download client). When files are imported to your media folder Radarr will hardlinkthe file if supported by your setup or copy if not hard links are not supported. Torrents that are paused and completed seeding will be atomic moved if hard links are supported or copy+delete if they are not.
- Hard links are enabled by default. A hard link will allow not use any additional disk space. The file system and mounts must be the same for your completed download directory and your media library. If the hard link creation fails or your setup does not support hard links then Radarr will fall back and copy the file.
- If the "Completed Download Handling - Remove" option is enabled in Radarr's settings, Radarr will delete the torrent from your client and ask the client to remove the torrent data, but only if the client reports that seeding is complete and torrent is stopped (paused on completion).
¶ How to import your existing organized media library
Note that Radarr does not regularly search for Movies. See the How does Radarr work? FAQ Entry for details to understand how Radarr works.
After setting up your profiles/quality sizes and added your indexers and download client(s) it’s time to import your existing organized media library.
Movies
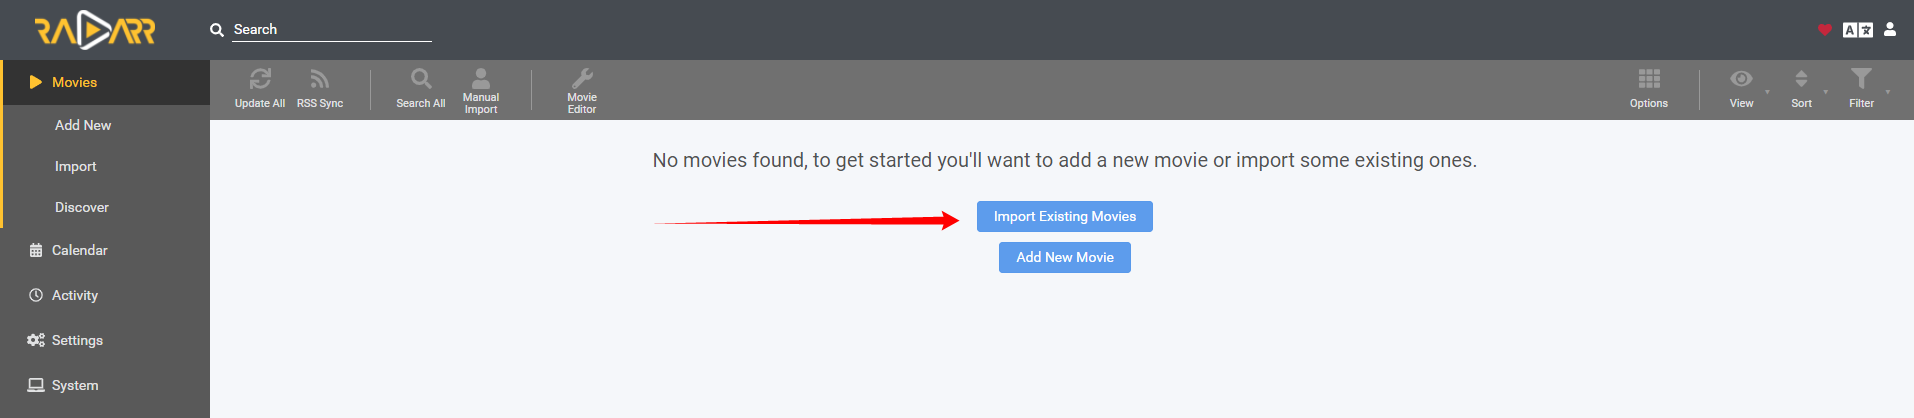
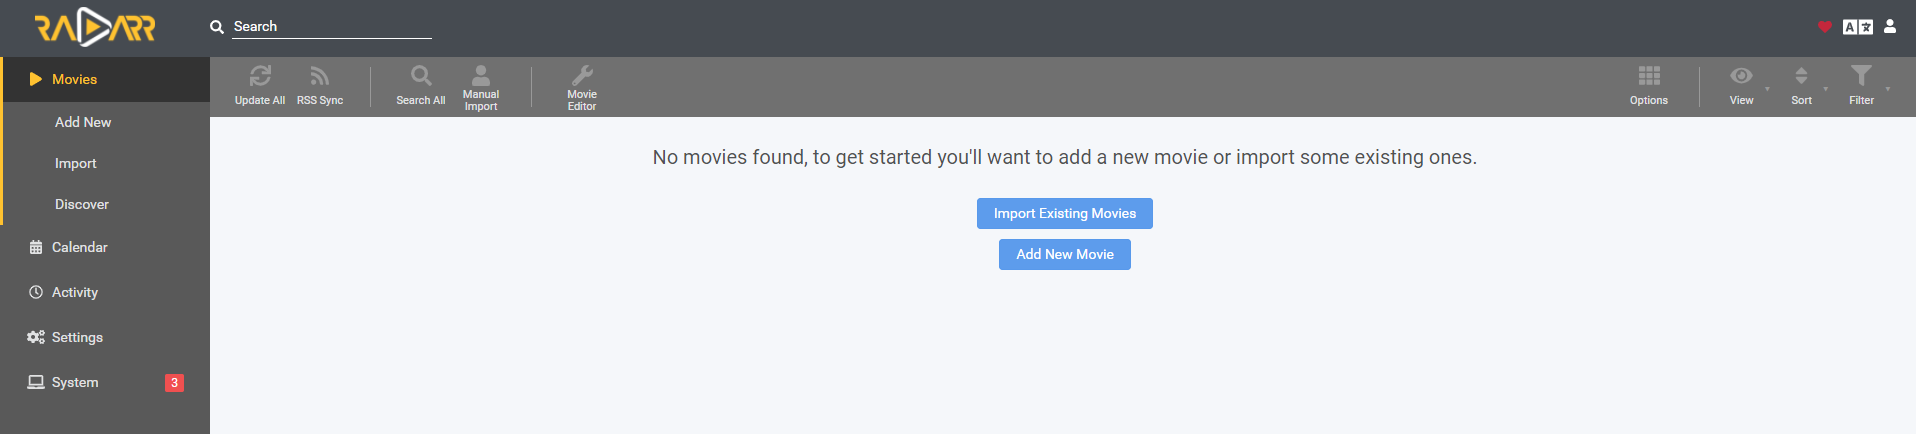
Select Import Existing Movies or select Import from the sidebar.
¶ Import movies
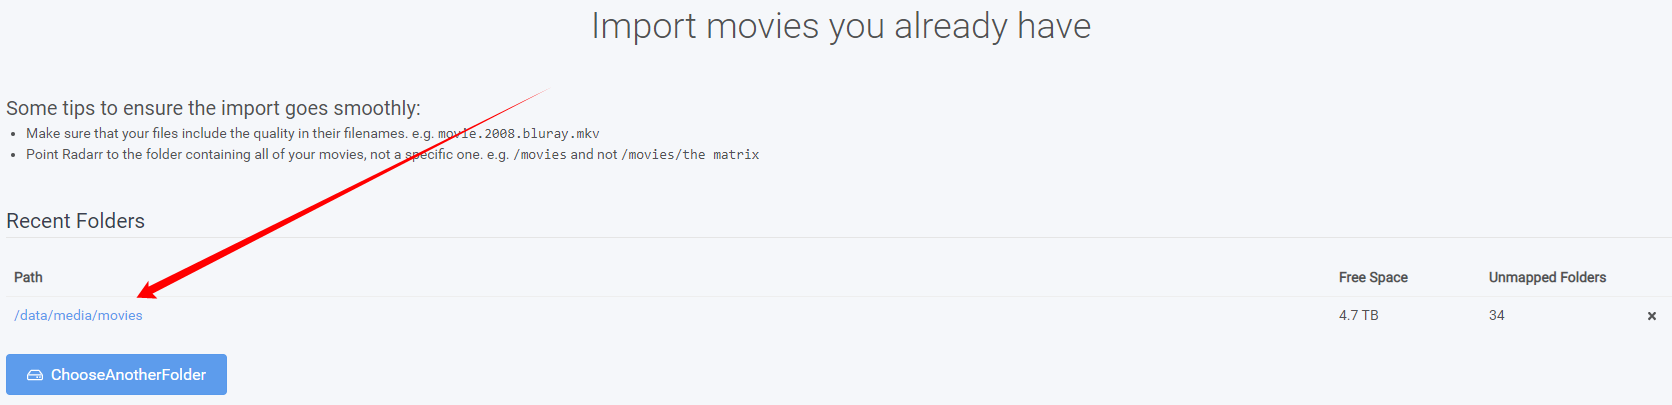
Select the root path you added earlier in the root folders section.
¶ Importing Existing Media
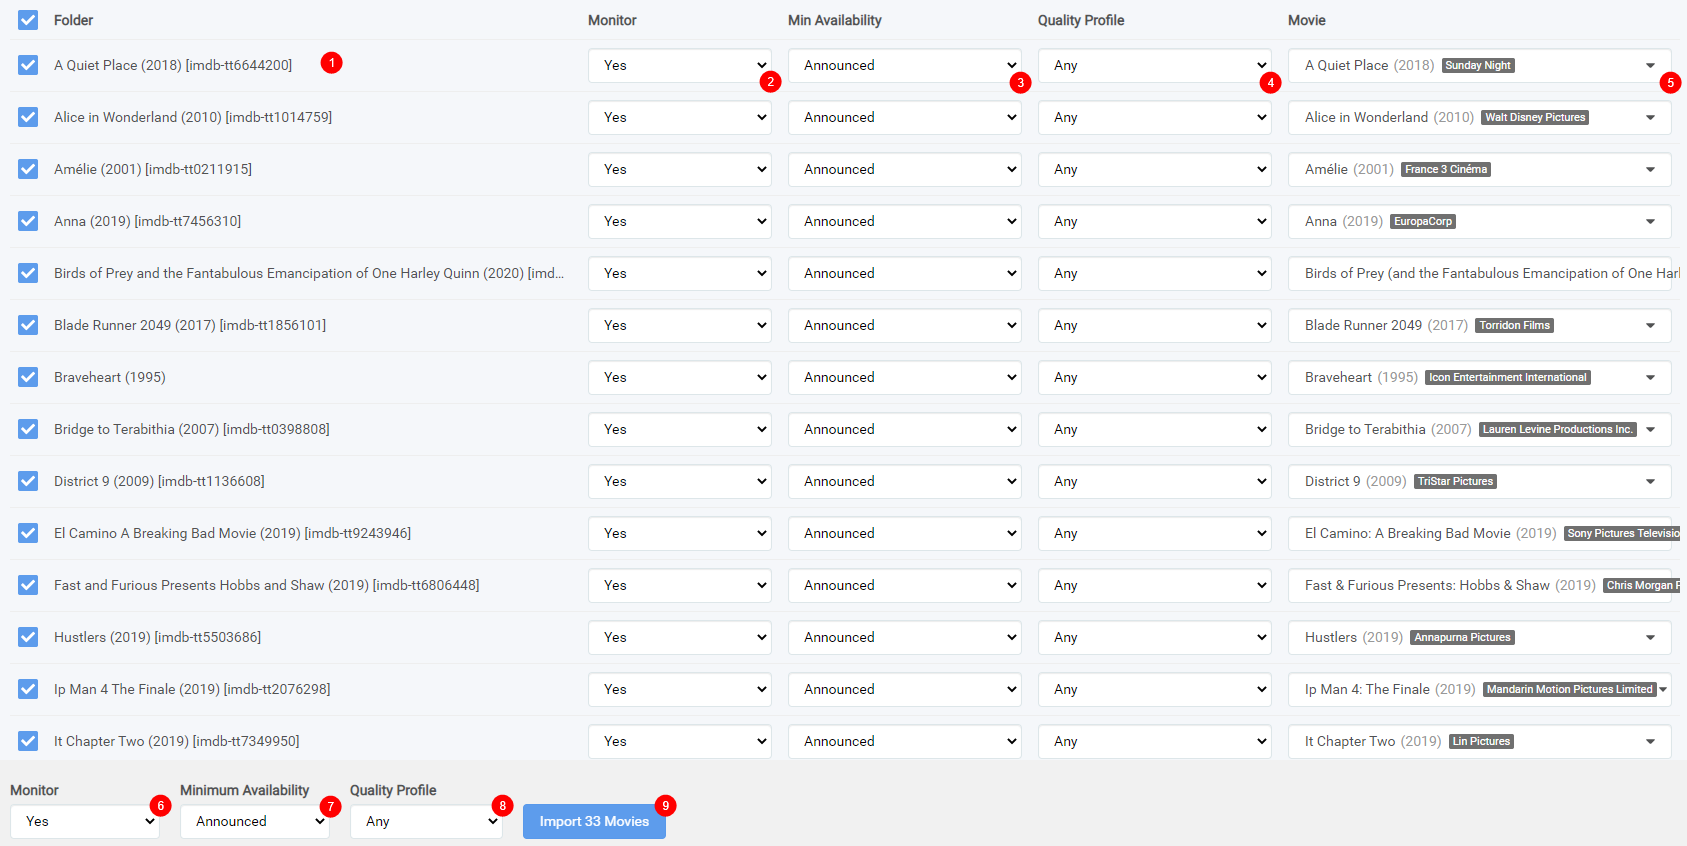
Depending how well you got your existing movie folders named Radarr will try to match it with the correct movie as seen at Nr.5 If all your movies are in a single directory follow this guide
-
Your movie folder name.
-
Monitor - How you want the movie to be added to Radarr.
- None - Do not monitor the movie nor collection for new releases
- Movie Only - Only Monitor the movie for new releases
- Movie & Collection - Monitor both the movie for new releases & add and monitor any movies in the movie's collection (if exists)
-
Availability - When will Radarr consider a movie is available.
- Announced: Radarr shall consider movies available as soon as they are added to Radarr. This setting is recommended if you have good private trackers that do not have fakes.
- In Cinemas: Radarr shall consider movies available as soon as movies they hit cinemas. This option is not recommended.
- Released: Radarr shall consider movies available as soon as the Blu-ray is released. This option is recommended if your indexers contain fakes often.
-
Quality Profile - Select your preferred profile to use.
-
Movie - What Radarr thinks the movie matched for. It is imperative that you review this and edit/search if the match is not correct. Mismatches are often caused by poorly named folders.
-
Mass select Monitor status.
-
Mass select Minimum Availability.
-
Mass select Quality Profile.
-
Start Importing your existing media library.
Once a movie is added to Radarr, Radarr will scan the movie's folder and attempt to match a video file in the folder to the movie. The most common cause for Radarr not matching the file and the movie thus having a Radarr Status of Missing is the filename does not have the year in it. Radarr requires the year in the filename for it to be parsable.
¶ No match found
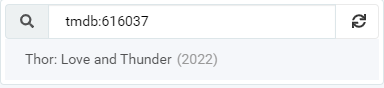
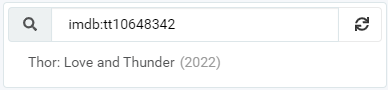
If you’re getting a error like this

Then you probably made a mistake with your movie folder naming.
To fix this issue you can try the following
Expand the error message
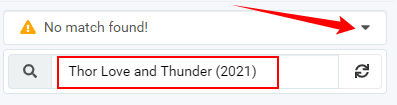
and check on the themoviedb if the year or title matches. in this example you will notice that the year is wrong and you can fix it by changing the year and click on the refresh icon.
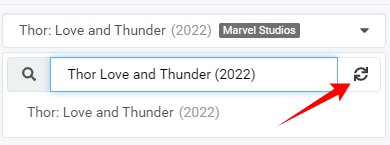
Or you can just use the tmdb:id or imdb:id (if tmdb is linked to imdb) and then select the found movie if matched.
¶ Fix faulty folder name after import
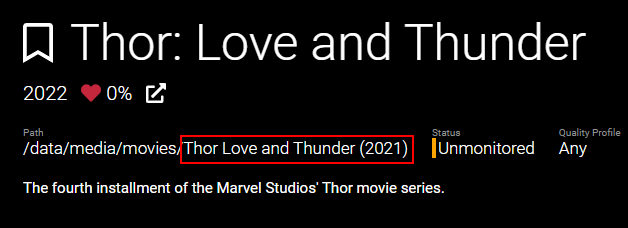
You will notice after the fix we did during the import that the folder name still has the wrong year in it. To fix this we’re going to do a little magic trick.
Go to you movie overview
Movies
On the top click on Movie Editor

After activating it you select the movie(s) from where you want to have the folder(s) to be renamed.
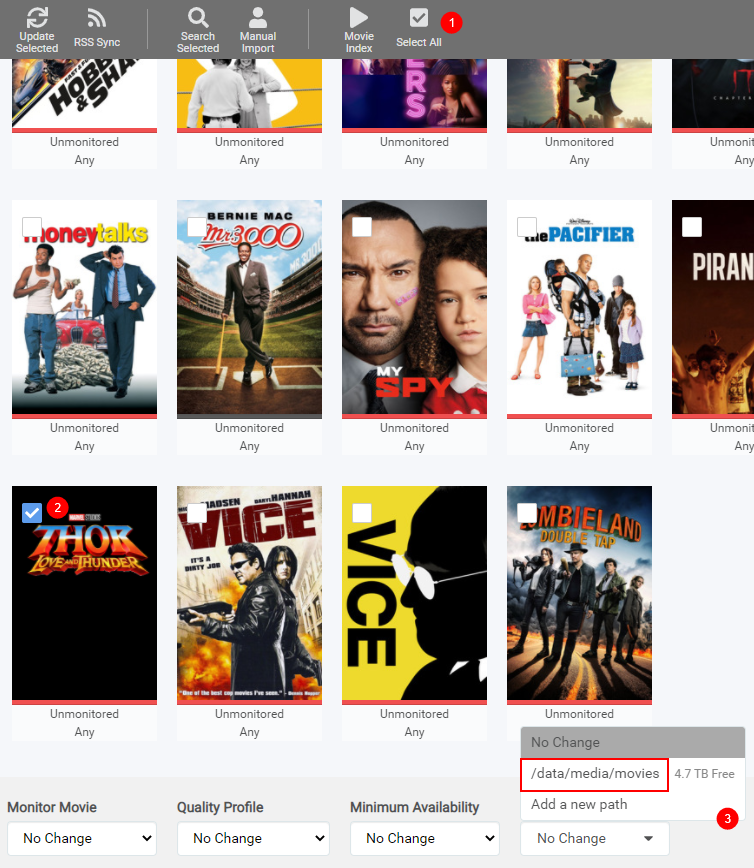
- If you want all your movie folders renamed to your folder naming scheme you set earlier movie naming section.
- Select the movie(s) from where you want to have the folder(s) to be renamed.
- Choose the same
Root Folder
A new popup will be shown
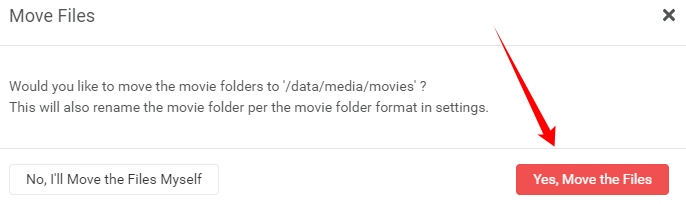
Select Yes, Move the files
Then Magic
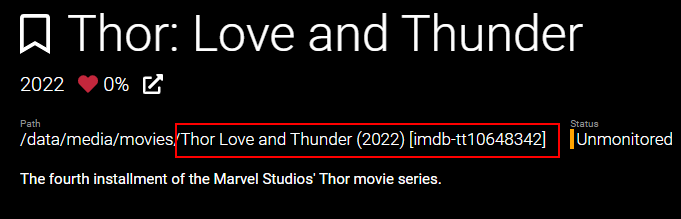
As you can see the folder has been renamed to the correct year following your naming scheme.
¶ How to add a movie
After you imported your existing well organized media library it’s time to add the movies you want.
Movies => Add New

Type in the box the movie you want or use the tmdb:id or imdb:id.
When typing out the movie name you will see it will start showing you results.
When you see the movie you want click on it.
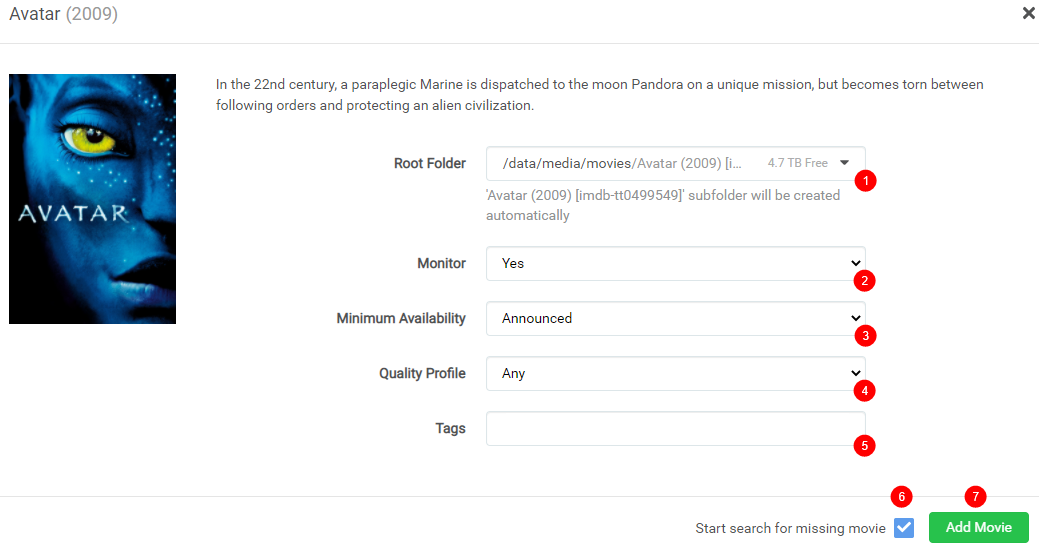
-
Root Folder - Radarr will add the movie to the Root Folder you’ve setup in the root folders section
-
Monitor - How you want the movie to be added to Radarr.
- Movie Only = Radarr will monitor the RSS feed for the movie in your library that you do not have (yet) or upgrade the existing movie to a better quality.
- Movie & Collection = Radarr will monitor the RSS feed for the movie in your library that you do not have (yet) or upgrade the existing movie to a better quality. It will also add all movies in this movie's collection (if any) with your selected settings.
- None = Radarr will not monitor the RSS feed, any upgrades or new movies will be ignored and have to be manually done. All searches for unmonitored movies must be manually triggered searches or interactive searches.
-
Availability - When Radarr shall consider a movie is available.
For More Information on TMDB's Dates that impact the below Availabilities See How Does Radarr Determine the Year of the Movie
- Announced: Radarr shall consider movies available as soon as they are added to Radarr. This setting is recommended if you have good private trackers that do not have fakes.
- In Cinemas: Radarr shall consider movies available as soon as movies hit cinemas (Theatrical Date on TMDb) This option is not recommended.
- Released: Radarr shall consider movies available as soon as the Blu-Ray or streaming version is released (Digital and Physical dates on TMDb) This option is recommended and likely should be combined with an Availability Delay of
-14or-21days.- If TMDb is not populated with a date, it is assumed 90 days after
Theatrical Date(Oldest in theater's date) the movie is available in web or physical services.
- If TMDb is not populated with a date, it is assumed 90 days after
-
Quality Profile - Select your profile to use for this movie
-
Tags - Here you can add certain tags for advanced usage.
-
Search on Add - Make sure you enable this if you want Radarr search for the missing movie when added to Radarr more info
-
Click on
Add Movieto add the movie to Radarr.- If you get an error of "path is already configured" see this FAQ entry